Welcome to Craft Resources Blog:

Craft Resources will provide info for Cross Stitch, Crochet, Free pattern, Origami and all other varies Craft found in the internet.

Some will be taken from the useful article and provide a link to embroidery or other craft design by the article Author. Hope you enjoy reading and staying in this blog. Feel free to input any of your comments. origami,crochet,wire jewelry,jeans,craft,hobbies

Thursday, October 16, 2008

Website Resources for Wire Jewelry Pattern

Website Resources for Wire Jewelry Pattern#

Here is my list of Website where i can refer on how to do new pattern in creating Wire Jewelry. Hope this resources also useful for you out there.

1. Wire Jewelry Making Project - Learn about wire wrapping, making your own jump rings and clasps, knitting and crocheting with wire, and even making chain maille jewelry!

2. Enioken - Make your own precious jewelry, few free lesson and tutorials by Eni Oken.

3. Bead with Swarovski - Create your own style of beading.

4. Robyn's Pattern - Check her pattern gallery for your reference.

5. Beading and Macrame - New Style of Beading at White Swan Website.

6. Bead Pattern Central - Bead Pattern Project to be downloaded.

...Will add up more if i found new useful reference on how to start new hobbies by making a wire Jewelry.

©Craft Resources

Jewelry Making Tips - Getting Started With Wire Jewelry Making

Jewelry Making Tips - Getting Started With Wire Jewelry Making#

Making wire jewelry is a popular and rewarding hobby for many people. It can however be confusing to beginners who are just starting out. This article will introduce you to the various tools and materials you will need to get your jewelry making hobby started.

SETTING UP YOUR JEWELRY WORKSHOP

Whether you are making your own wire wrap jewelry as a hobby or you are starting your own business making wire jewelry, you will need to have an area that will promote creativity and enable you to concentrate. Spend some time planning and organizing your jewelry making workshop now so that you will be more productive when you get started.

Many of us do not have the luxury of a private workshop where we can escape from the noise and interruptions of our busy homes. This doesn't mean you should lose hope and give up on your wire jewelry making dreams, it just means you will need to be a bit more creative with your space.

Try to find a place that is as private as possible, away from phones, televisions and other interruptions. Perhaps you can clear a space out in your garage or attic. Maybe you have a corner of a guest room or a spot in your basement.

Next you will want to consider lighting. Lighting is very important in jewelry making. Find a room near a window with lots of natural light if you can, but if you cannot find such a location, you will need to invest in a natural lighting alternative. There are special types of lighting and bulbs available that simulate natural sun light. Just do a search online and you will most certainly find something. Full spectrum bulbs are close to natural sunlight.

You will also need a way to organize and store all of your jewelry making tools and supplies as well as a surface or bench to work on. Professional jewelry benches can be expensive, so if you cannot afford one, visit a used furniture outlet, flea market, or good will outlet and purchase a bench there. Look for a sturdy solid wood desk that is wide and deep enough to give you plenty of space to work on. If it doesn't have drawers, you can purchase an affordable organizer with drawers at any home improvement store. This can be used to store your supplies.

You will also need a chair. You should take your time when shopping for a chair as you will spend a lot of time sitting at your desk. You will want a chair that is comfortable and has wheels so you can conveniently slide around your workspace.

If you are unable to invest any money right now into buying your furniture, don't let that stop you. Your kitchen table will work as a descent substitute. Many beginners get started that way.

WIRE JEWELRY MAKING SUPPLIES

Pliers

There are a wide assortment of pliers and cutters available for wire jewelry artists and each tool has its own purpose. Most professional and experienced wire jewelry artists will normally have a big collection of these tools on hand, but for a beginner it is not necessary. You will only need a few to get started. Pliers are made with various nose shapes and some are made fitted with springs. Springs enable the artist to control tension on the wire. Pliers are also available with nylon jaws that prevent scratching on the wire.

Flat Nose Pliers

These are excellent for holding, flattening and straightening wire. You can also use these pliers to make angular bends.

Round Nose Pliers

Round nose pliers are great for making bends, curves and for forming loops. They are also great for detailed and delicate work.

Flush Wire Cutter

A good flush wire cutter will cut through gold, silver, brass or copper wire and give you a flush even cut.

WIRE

Wire comes in a variety of different sizes, otherwise known as gages. Smaller wire has a higher gage number. For instance a 28 gage wire has a smaller diameter then a 14 gage wire. For your first wire jewelry pieces, it is probably best to begin with a higher gage wire, which will be easier to work with. Once you become more skilled at this, you can then start working with thicker and stronger wires.

Wire also comes in a variety of different shapes: round, square and half round. Round wire is a more popular choice amongst wire jewelry makers, but the other shapes can give your jewelry pieces a unique and interesting look.

Wire also comes in different degrees of hardness. Obviously softer metals are more pliable and easier to bend where as hard metals are stiffer and more difficult to bend and shape. Wire hardness is available from dead soft to extra hard. Dead soft wire is very soft and easy to work with. It is excellent for sculpting , but be careful with this wire. It is very soft and it can be easily damaged if not handled carefully. Hard wire is the most difficult to work with and manipulate, but it does have an advantage over the others as your jewelry pieces will be more durable and last longer.

Wire is also available in a variety of different metals. You have your choice of copper, silver, gold or brass. Copper and brass are cheaper than gold and silver. It may be best to start out with the cheaper materials until you become more experienced.

CREATING YOUR FIRST PIECE OF WIRE JEWELRY

Once you have found a good work area and have your basic supplies, its time to start practicing and creating your first piece of jewelry. In the beginning it will certainly be challenging to come up with your own designs, but thankfully there are many accomplished wire wrap jewelry makers out there to help you along the way. Go online or to your favorite book store and purchase a beginner book on wire jewelry making or invest in a home study course. There are great courses online that come complete with all the tools and instruction you will need to get started. You can even start your own lucrative home based business making wire jewelry.

I hope this introduction to wire jewelry making has helped and has gotten you excited enough to explore this craft in more detail. Happy jewelry making!

Article Source: http://EzineArticles.com/?expert=Ralph_Serpe

©Craft Resources

Monday, April 14, 2008

The Origin of Quilt Block Names

The Origin of Quilt Block Names#

Have you ever wondered how quilt blocks are named?

As you look through a book with hundreds of quilt blocks, several interesting things pop up. You will probably discover quilt blocks with a different design while having the same name. Likewise, you will find quilt blocks that look the same yet have different names.

How did this happen? And what is the inspiration for naming quilt blocks in the first place?

A look at history and understanding life in the early years of America are particularly useful to answer these questions.

Since early Americans were driven from England to gain religious freedom, they continued to be very religiously minded in the New World.

All day Sunday was spent at church for both religion and social time. The morning and afternoon sermons were divided by an hour-long lunch break where families would share the events of the week while enjoying the peaceful meal.

Many quilts and quilt blocks reflected that religious devotion.

"World Without End," a quilt made during the Revolutionary time period, is a name lifted from the Book of Common Prayer. It was, and still is, a phrase familiar in every church, regardless of creed.

It's also interesting to see the range in complexity of making quilt blocks and quilts. The "Star of Bethlehem," "Jacobs Ladder" and "Job's Tears" represent quilts and blocks and were more studied designs. While the "Star and Cross" and "King David's Crown" were simpler and very popular for bed quilts.

In addition, early Americans were also very politically minded. Even though women couldn't vote, they were acutely aware of the importance of the politics of the day.

While originally the political efforts were directed toward economic freedom and relief from onerous taxes, later the politics shifted toward political freedom as well. After a century of local government, Americans were politically astute, and were dedicated to developing the machinery of a republic that would survive.

And the political conversations extended into the quilt blocks created during that time, enabling quilters to express opinions developed as they listened to the arguments of the day.

Even naming a quilt block stirred controversy. A block named "Whig Rose" and "Democrat Rose" created a debate as to which was the correct name - a debate not settled, maybe even today.

Politics and quilts continue to intertwine with "The Little Giant" being named after Stephen A. Douglas (from the Civil War era), the "Free Trade Block" (which has relevance today), "Fifty-four Forty or Fight" (from the early 1800s fight between the US and Canada over territory in the northwest territory) and "Tippecanoe and Tyler Too" (a campaign slogan during the Harrison presidential election in 1840).

The trades and occupations of the time also offered inspiration for quilt names. "The Anvil," "The Carpenter's Wheel," "The Churn Dash," and "The Water Mill" all came from women's familiarity with old-time callings.

"The Reel" was a block that represented the once universal occupation of women - spinning. The Reel was used to wind thread onto skeins.

Outdoor life provided more inspiration for quilt block names. Take, for example, "Flying Bats." Bats were once very common, and without screens in open windows, bats would be attracted to the light inside houses. Once inside, blinded by the light of the lamps, the bats flapped and banged against walls and the ceiling while women ducked and screamed while small boys made a game of chasing them.

Since the sun, candles and oil lamps were the only source of light, the pioneers relied on the natural light of day for most of their activities. Industrious folk rose early and were able to witness the glory of every sunrise. It wasn't too unusual that "Rising Sun" quilts would be created.

There are two different methods of making this intricate pattern, both reserved for expert quilt makers.

In sharp contrast, quilt blocks representing the setting sun are much simpler. A Block like "Setting Sun," also known as "Indian Summer" took some skill, since it includes triangles on a curve, yet was not as complex as the Rising Sun.

Maybe the contrast represented the difference in the level of energy of a quilter between the early morning rising and the end of the day, having completed a full day's work.

Many designs were specific to their community of origin. And as they migrated away from the community, their form changed. Since there were no printed patterns at the time, duplication of the design depended on copying the pattern by looking at an existing quilt, remembering the design having seen it previously, or understanding a verbal description of the quilt block.

Any of these methods could result in the proportions of the shapes within the block changing, therefore changing the overall look of the quilt; and a new block design with the same name was born, even though the quilter thought she was duplicating the quilt block exactly.

What will be the inspiration for the quilt block you design?

Penny Halgren
http://www.TheQuiltingCoach.com Penny has been a quilter for more than 26 years and enjoys sharing her quilting knowledge with beginner quilters so they can avoid the mistakes she made as she was learning to quilt.

Article Source: http://EzineArticles.com/?expert=Penny_Halgren

©Craft Resources

Easy Quilt Patterns

Easy Quilt Patterns#

Are you looking for some quick quilt patterns? Maybe you are just beginning to quilt. Or perhaps you have a baby shower coming up and you want to give a present that is pretty, but will not take weeks to finish.

Well, you have come to the right place. The following easy quilt patterns look gorgeous and can be finished quickly. In fact, for a baby sized quilt, the quilt top can be completed in less than 24 hours.

1.Log Cabin

The Log Cabin is perhaps the best known of the quick quilt patterns. First, it is colorful. The pattern can use up to 13 different fabrics in a block. Next, it is easy. If you can sew a straight seam (and even if you can't) you can still make a lovely quilt from this block. Plus, it is quick. Using modern strip piecing techniques, you can easily complete the quilt top in less than 24 hours.

2.Whole Cloth

A whole cloth quilt is just one entire piece of fabric the same dimensions as a pieced quilt top. Actually, there are fabrics out there that look like pieced quilt tops. They are gorgeous and excellent practice.

Please do not think that a whole cloth quilt is not "real." As long as the quilt has a top, batting and a backing stitched together, it is a quilt. Whole cloth quilts are wonderful ways to practice. They are definitely worth investigating for the beginning quilter.

3.Four - Patch

You can't get much easier than a Four-patch block alternating with a plain square. These basic patterns allow you finish a quilt quickly. This pattern also lends itself to novelty prints.

4.Denim Rag Quilt

Denim rag quilt patterns are all over the web for good reason -- they are comfy and sturdy. Plus, now you can recycle your old jeans into something useful!

For beginning quilters who are scared of actually quilting the quilt sandwich or attaching the binding, this is a great first project. A denim rag quilt is rugged. It is simple. It is the go-to quilt for picnics and watching fireworks.

5.Rail Fence

A rail fence is one of the easiest quilts to make. It requires only three coordinating fabrics and very minimal cutting. It is also very forgiving if your seam allowances are off.

Can a beginning quilter make a gorgeous quilt? Of course. You just need to choose a pattern that displays the fabric and not your stitching. So, go ahead; choose one of the simple quilt patterns listed. You can't go wrong.

Maybelle Maddison is a true Southern Belle and dedicated quilter. She has made it her mission in life to spread the joy of quilting! Visit her site at http://www.joannfabrics.org for quilting information, pattern reviews and suggestions on how to start and keep quilting!

Article Source: http://EzineArticles.com/?expert=Maybelle_Maddison

©Craft Resources

Beginner Quilting - Beginners Guide To Make Block Quilt

Beginner Quilting - Beginners Guide To Make Block Quilt#

Quilting - this is something you can have fun with and use it too. Fun, well don't we all like to stay warm in extreme conditions, sit in a warm quilt and watch television.

Add some really true blue colors to that quilt and fabric that makes you feel extra comfy. With heart felt trueness - there's no better feeling than to be able to utilize one's own self created product.

Today machines have overpowered our lives beyond imagination and yet if you were able to have something that you can claim to be handmade wouldn't express be an achievement of sort.

Quilters like us can have that distinction, yeah almost handmade, as we would require a sewing machine. If the craft of quilt making is to be kept alive then the responsibility will have to be shouldered by some of us thus a start to finish education in very essential for that.

Quilts can be either the simple ones or the more elaborative designed ones, the latter being for the more experienced quilters. Starters always have a query as to what's the simplest form of quilt making and it is - a basic block quilt.

But what they forget to inquire "How to make block quilt for starters?" Sorry if you are looking for an as easy answer, there can be a whole think fat book written on this matter and I can talk about it for ages. Right now though no lengthy explanations, here is a primary guidance for those looking to start and finish a hassle free project.

List of tolls and supplies required :

* Customary sewing machine
* Spray starch
* Rotary cuter
* Embroidery needles - general size 12
* Iron
* Needles
* Cutting mat
* Quilt batting
* Fabric in 4 colors or 4 shades.
* Pins- beaded head
* Design for block quilt
* Rotary ruler

ASSEMBLING A BLOCK QUILT:

Block quilt is nothing but a quilt that is simply designed. In simple terms, one design on a selected block in sewed on after the other in similar fashion till the desired size is accomplished.

A block can be called as the unit for the quilt. Here below are some steps that could make your block quilt making experience much easier.

1) Get the fabric ready: washing the fabric separately is a prerequisite. That is if you want to ensure that there is no color loss or shrinking fabric dilemmas later. Let it dry dey and then proceed to iron the material once you have sprayed starch to it. Make sure that the material is entirely dry and hard sans wrinkle.

2) Cutting of fabric: Take the fabric and put over a place mat in the form of a heap one over the other. Then take a measurement scale and slash 2 inches X 2 inches pieces using a rotary cutter. Create as many pieces of out the fabric depending on the dimension of the quilt that you'd like o make.

3) Assembling a Block: Once you have the pieces stitch them all to make a bid square or a simple block. Carry on sewing to make multiples of identical blocks.

4) Piecing: This process will see you create the wanted dimension of the quilt once all the blocks have been stitched together.

5) Batting: The batting material should be placed above on the piecing. The upper side of your piecing should face the mat while the sewed portion along the batting. Take the lining material above it.

6) Quilting: take the help of a sewing machine to stitch all 3 layers with one another. For first time learners its recommended that stitching take place on and around a primary block while those who have prior knowledge may select extravagant patterns.

7) Binding: All sides of your fabric should be binded.

Discover free beginner quilting tips instructions and 101 beginner guide to quilting at http://www.quilthowto.com, written by experienced crafter, Jennifer Walter.

Article Source: http://EzineArticles.com/?expert=Jennifer_Walter

©Craft Resources

Monday, March 3, 2008

How to Make Amazing Crafts with Kids

How to Make Amazing Crafts with Kids#

Arts & crafts with kids!

There are countless reasons why it is a great idea to do arts and crafts with your kids. For one, working on arts & crafts helps to hone children's creativity. Arts and crafts can also help promote teamwork and sharing, as well as offering the perfect opportunity to bond and find new common interests. Arts and crafts also allow kids to openly express themselves, even at very young ages. Nonetheless, despite all these positives, the best reason for getting your kids involved in arts and crafts is that it is fun! If you are panicking that you will not know how to guide your child through their first craft, there is no need to worry; there are plenty of arts and crafts ideas for all ages from pre-schoolers up through teenage artists.

Best practices for doing arts & crafts with kids

1. Don't ask "What is it?" when you are befuddled as to the identity of your kid's final creation. Just ask your kid to tell you more about their art or craft, and let them explain how they see their creation.

2. There will be a mess. There is nothing you can do about it. As soon as you make that realization, the whole experience will be far more enjoyable. Indeed, sometimes it is even important to make a mess. Take that knowledge to plan ahead. Get a large clear workspace for your kids, and give them the opportunity to be creative without having to worry about getting paint on your new Persian rug

2. Making arts and crafts is supposed to be about using your imagination. For this reason, try not to show your kids a completed craft as an example. Instead, let your kids learn to interpret the instructions as they wish in order to truly be creative. This will also give your kids a good lesson on the best ways to follow and adapt instructions.

4. Making arts and crafts requires a lot of focus. For this reason, it is best to get your kids to calm down a bit before placing them in front of glue and scissors.

Basic supplies for making arts & crafts with kids

Just like your kitchen pantry, a kid's craft drawer should have a few staples. While you may need something more specific for special crafts, for the most part you will be able to get by with the following list: kid-friendly paint, scissors, crayons, etc. It's also a good idea to keep a drawer stocked with construction paper, beads, glitter, paint brushes, glue sticks, and the ever popular "wiggly eyes."

The education benefit of arts & crafts

Arts and crafts can be used to apply hands-on learning to any subject. Using crafts this way helps kids think more in-depth about the subject of their artwork or craft projects. Virtually any subject matter can be taught using arts & crafts with a little creativity. For instance, if you are learning about world geography, you could have the kids make a tissue paper globe.

Learn about holidays, history, and any other topic your kids should study. Even math can be enriched through arts and crafts. Remember that school isn't the only place kids should be learning; your kids will be much more willing and excited to learn if you make learning fun with interactive arts and crafts projects.

Some ideas for kids' arts & crafts

Kids' arts and crafts can be quick and simple to keep the attention of on-the-go toddlers. They can also be sophisticated and complex for older kids who are up to a challenge. To get an idea of the scope of arts and crafts projects out there, take a trip to your local arts and crafts store or teacher's supply shop. These stores will have pre-designed craft kits, including jewelry art, painting kits, and other craft ideas. Each kit will come with instructions and all of the materials you require.

Another good idea, once you have gained some experience, is to walk arts and craft stores to shop for kids' art ideas. Here are some ideas: try straw painting, where kids can create arts and crafts by blowing paint through a straw onto a poster board or construction paper; or let your kids dip marbles in paint and roll them across the painting surface for a messy (but fun!) painting project. If you are looking for something a bit less messy then try pipe cleaner art. This is a great craft because kids of all ages can join in. Young children can use their imaginations to create simple objects out of pipe cleaners. Older kids may enjoy incorporating other supplies such as beads into pipe cleaner art.

Mary Amos loves arts and crafts and has been creating amazing projects for kids and families for years. See her exciting new ideas at Arts and Crafts with Kids, and be sure to visit Arts and Crafts for more fun projects!

©Craft Resources

Choosing The Right Art and Craft Supplies For Your Kids

Choosing The Right Art and Craft Supplies For Your Kids#

Doing arts and crafts with your children from an early age has shown to be important in recent studies. Arts and crafts can develop your kids motor skills and imagination. You will not have to worry about by expensive arts and craft supplies for children to get them interested. As a general rule, kids love arts and crafts so even if you only get them some simple arts and craft supplies to work on, they will soon be engrossed in the activity.

Although kids love just about any type of arts and craft supplies that they can get their hands on, you should not just any type of arts and craft supplies for your kids to use. Always remember that they are some types of arts and craft supplies that contain harmful ingredients so you should be very careful when buying art and craft supplies for your kids. To help you choose the right type of art and craft supplies for your kids, here are some tips for you.

Checkout The Label

Before you buy any type of art and craft supplies, you should read their labels carefully. Look for the "non-toxic" sign on the packaging to make sure that the item is safe for your kids. When shopping online, make sure that you deal only with reliable and reputable companies. Always remember that labels are so easy to fake these days and there are many people out there who do not have any qualms about selling products that contain toxic ingredients.

Watch Out For Lead

When buying coloring materials, make sure that the coloring materials you buy are free from any lead contents. According to studies, lead can cause a lot of health problems on your kids. Lead can affect the mental development of your kids so be very careful not to expose your kids to this substance. In most cases, lead and other toxic ingredients is present in permanent marking and coloring materials. To be on the safer side of things, buy only those water-based and non-permanent markers. Moreover, buying water-based products have other advantages. For one thing, it your kids decide to use your walls as canvass, it will not be impossible for you to wipe out the markings on the wall.

When It Comes To Glue White Is Best

Although those colorful glue are very attractive, they are usually more toxic compared to plain white glue. An alternative to white glue would be a white library paste. The good thing about white library paste is that it is less messy compared to the glue.

Benjamin Brookes has an arts and crafts blog with plenty of articles and resources at Art Supplies - Fiber Optic Art Supplies

Article Source: http://EzineArticles.com/?expert=Benjamin_Brookes

©Craft Resources

Kids' Craft Ideas - Growing Your Own Balloon Garden

Kids' Craft Ideas - Growing Your Own Balloon Garden#

Crafts will always be a very important teaching tool for anyone teaching little kids. Kids learn best by "doing." Homeschoolers and especially Unschoolers can use this balloon craft as part of a biology lesson. This is a wonderful kids' craft idea, that is fun and easy to do and also a great first lesson about plants. This craft use balloons so watch the little ones, while you are doing this craft, to prevent suffocation!

All you need for this kids' craft idea is a medium or large sized, clear balloon, a little earth and water, some seeds, a small funnel and a piece of string. Radish seeds work well, but you could use almost any seeds that are easy to grow.

Kid's Craft Ideas Step by Step - How to make your first balloon garden

1. Don't blow your balloon up yet! Put the mouth of the balloon over the funnel and hold it firmly in place (this is where an extra pair of adult hands comes in useful!) Tip in around a ½ cup of earth - enough to almost fill the deflated balloon.

2. Now gradually add water, via the funnel again, until the earth is wet through. Don't put too much water in or it will all just turn to mud and start overflowing!

3. Dry your funnel, then add your final ingredients, the seeds, into the balloon, still holding it firmly in its upside down position.

4. Still holding the balloon upside down, so that you don't get a mouthful of dirt, carefully blow it up.

5. Tightly make a knot in the top of the balloon, then tie your string around it and use the string to hook the balloon garden up near a window or other well-lit place.

Making balloon gardens is a fun thing to do at birthday parties, and will keep the kids occupied and happy for ages - as long as you don't mind the mess! On a summer's day, it's best done in the backyard.

Balloon gardens also make lovely gifts, the children can make them for an adult friend or relative and the recipient will be delighted - especially when they hang the balloon garden up and it grows green and lush.

Grandmothers and grandfathers especially love this kid's craft idea - either to do with the kids (especially a granddad who is a gardening enthusiast) or just to receive a balloon garden craft as a gift. They will love that the kids will want to keep coming back to visit them and seeing how their balloon garden is growing.

When the balloon garden slowly dies off, it is a good opportunity to explain to your kids about the cycle of life, and to help them make a new balloon garden! Use this opportunity to teach them a variety of facts about nature, not only the cycle of life. Plants need water, fresh air, good soil etc. to grow. You can also work a lesson about seasons into this craft.

Enjoy your "Balloon Craft."

Magriet is a work at home "Gran" with websites on family related matters. Visit her insightful site about homeschooling at http://www.homeschooling.topknacks.com

She also have a site on Kids Crafts that is very related to homeschooling at http://www.kidscrafts.topknacks.com

You can also visit her fun website with easy science projects ideal for the homeschooler at http://www.learnerscience.com

Many of the kids crafts can be used for science lessons and many of the easy science fair projects will actually make fun kids crafts.

Article Source: http://EzineArticles.com/?expert=Magriet_Du_Plessis

©Craft Resources

Thursday, February 28, 2008

Bernat Free Crochet Pattern

Bernat Free Crochet Pattern#


Click this link >> Bernat

©Craft Resources

EMS Cross Stitch Design

EMS Cross Stitch Design#


Click this Link >> Free Pattern at Ellen Maurer-Stroh Cross Stitch Design

©Craft Resources

Free Pattern at CyberStitchers

Free Pattern at CyberStitchers#


NOTE :
Need to have PCStitch Program to download the Attach Pattern

Check this Link >> Free Cyber Stitchers Cross Stitch Pattern

©Craft Resources

Free Cross Stitch Charts from Ant Of Sweden

Free Cross Stitch Charts from Ant Of Sweden#


Click This Link >> Ant Of Sweden

©Craft Resources

Wednesday, February 27, 2008

Craft Design for You

Craft Design for You#


Click this Link >> FREE Cross Stitch Patterns of Cats, Dogs, Snowmen,Sweet Sentiments and More!

©Craft Resources

1-2-3 Stitch!

1-2-3 Stitch!#


Click This Link >> 1-2-3 Free Cross Stitch Goodies from 1-2-3 Stitch!

©Craft Resources

How To Make Origami Flowers

How To Make Origami Flowers#

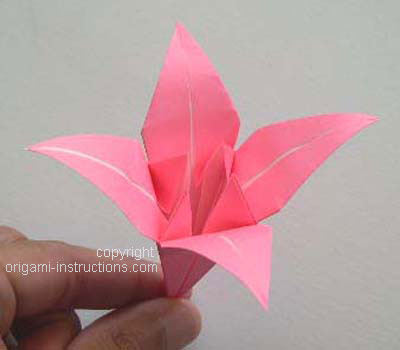
Origami is a Japanese word meaning the art of folding papers into shapes to create decorative objects. Learning how to make origami flowers will give you a sense of pride and accomplishment.

Any local hobby, or art store would carry the specific color or colors of origami paper that you may need to construct your flowers. You can use regular newspaper but it is usually too thick for the folding process, however the specialized origami paper is thin enough and cut to the right size and shape.

When making an origami flower this is exactly what is done and for these origami flowers only a few tools are needed. Aside from origami paper the only tools you need are; a pair of scissors, a pencil, and a ruler.

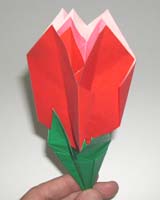
One of the easiest origami flowers to make is the rose. Four sheets of origami paper are needed, one sheet for the leaves (green) and three sheets for the flower (red). The second red piece is about three quarters the length of the first, and the third is about three quarters the length of the second one. The fourth square (the green one) is the same size as the largest red piece. Origami square base is the pattern that will be used to fold all three of the red pieces. This process is very simple once you learn it.

Take one square and fold it on the diagonals, then on the East-West line and the North-south line.

Make sure that the colored side is facing upwards. Now fold the diagonals as the valley goes (downward), and the East-West and North-South as the mountain goes (upward). Repeat this process on the other 2 red pieces.

Make an imaginary line through the paper, then fold and unfold the right corner of the base to the middle of the imaginary line. Next fold the edge onto the crease mark you made and unfold it. And then you can fold the right edge to the left, and repeat this process on the reverse side. Perform the same steps on the other two pieces of red origami paper. Then, put the rose petal forms inside one another to giving your flower a 3D look. Lastly, shape the green paper to make leaves and put it underneath all the red pedals for a beautiful flower.

Origami flower art is an inexpensive hobby that can be very rewarding. It's not hard to learn, once you get the right directions, and it's very much fun to do. One or two hours spend on learning these processes is approximately all the time it would take. The creation of origami flowers gets faster the more of these lovely flowers you make.

Erich Simko is an avid and enthusiastic Paper Flower creator, Origamist and Arts and Crafts buff. Learning these skills in particular has helped him through difficult times in his life and he believes it will bring much joy to your life as well. To receive more proper instructions with illustrations than this article allows to explain, Erich invites you to visit this fabulous resource to learn How To Make Origami Flowers.

Article Source: http://EzineArticles.com/?expert=Erich_Simko


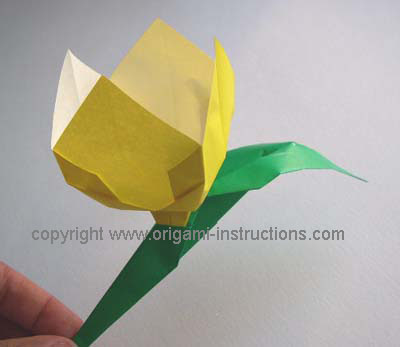
Related Link taken from: The Piece of Paper

Origami Kusadama Flowers


Related link taken from:
u-n-me bouquet


Origami Standard Rose

more origami flower Click to this link....

©Craft Resources

5 Valentine's Day Craft Ideas

5 Valentine's Day Craft Ideas#

We could all spend a little extra on a really nice meal or buying your partner some perfume that they really like. But if you really want to show your partner your romantic side then why not also present her or him with a gift that you have made yourself. Not to mention it can be loads of fun. Below we provide 5 different Valentine's Day craft ideas which you may want to consider trying for this coming February 14th.

1. Candy Filled Heart - Take some white or pink paper (not too thick and not too thin) and cut out two identically shaped hearts. Then take one heart and decorate this using glitter etc, and when dried attach to the other but leave the top of the heart open so that you can place a number of beautifully made heart shaped chocolates inside. Then seal and present to your loved one.

Related link taken from : Trish's Crafts

Valentine's Day Craft Idea - How to Make a Candy Heart


2. Heart In Your Hands - For this you will need to scan your hand into a computer and then using a program such as ClipArt or PhotoShop place a heart in the center of the palm. Then very steadily insert a picture of your loved one into the center of the heart and on it place the saying "You Have My Heart in Your Hands". Once prepared, print off the picture onto some heat transfer material and then transfer the image on to a piece of clothing of your choice.

3. Mouse pad - If your partner spends hours at their computer each day why not present them with a mouse pad on which you can place a message of love that they will be able to read and treasure throughout the year. To make it even more special why not go for a heart shaped one rather than the more traditional square or oblong ones.

Related link taken from : Twelve22.org

How to make a Mouse Pad Cover


4. Love Scrapbook - If you have the time why not make up a book of the time that you have been together and which you can then present to your loved one on Valentine's Day. It is a good idea to keep hold of little mementos from days that you have spent together such as ticket stubs of places that you visited (cinemas, theatres etc). Also, include within some pictures and words that mean things to you.

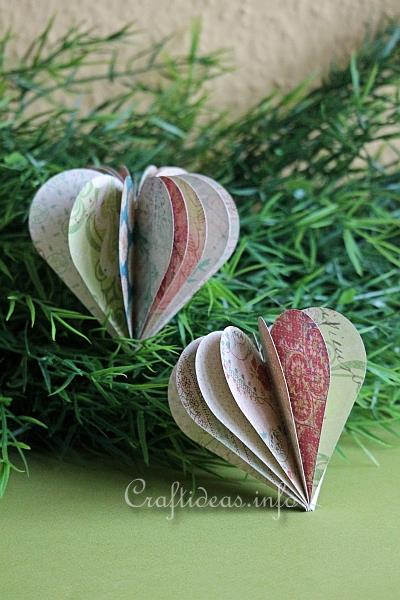
Related link taken from : CraftIdeas.info

Scrapbook Paper 3-D Valentine's Heart


5. Valentine's Wreath - Again if you have time get hold of some various sized wooden hearts and then paint them. Ideally use colors such as pink, red and white for them and then write words that are important and special to you both. Once dried stick them onto a grapevine wreath and add a ribbon to it so that it can be hung up for all to see.

Along with the Valentine's Day craft ideas we have provided above for you, a quick search of the internet and you will find plenty more. Making something yourself will really show the person to whom you are giving the gift just how much they really mean to you. It's often the effort that shows the love.

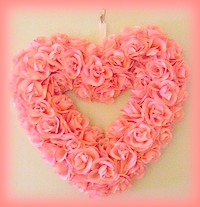
Related link taken from : All Free Crafts

How to Make a Heart of Roses Wreath


Jason Parker is a rep at St Valentine's Day Gift Baskets where the sweetest and tastiest gift baskets are available.

Article Source: http://EzineArticles.com/?expert=Jason_S._Parker

©Craft Resources

Got Knitting Questions? I Have Answers!

Got Knitting Questions? I Have Answers!#

One of the things I love about knitting is that there is always something new to know about! So much information is out there, in magazines, knitting books, websites; it can become confusing very quickly if you don't know just what is basic to your knitting needs.

After all, do you really need to know what brand of lighted knitting needles to purchase or which brand of silk yarn will knit up best with that advanced pattern you found, when you still want not-so-advanced information?

In this article, I've searched my files for the best basics for knitters! When you have this knowledge, so much of the rest will begin to make better sense.

Knitting Needle basics. There are the straight needles we all know and use, but what do you do with double-pointed & circular needles? Double pointed needles come in sets of four or five and are used to make items such as mittens, socks, and other round pieces. Circular needles are used when casting on a large number of stitches, i.e. 100 or more, and then you "knit in the round". When you knit a large afghan or sweater, circular needles are wonderful. They are easy on your fingers, and can be taken anywhere.

Yarn basics. Does it matter which yarn I knit with? It sure does! With so many yarns available these days, choosing what to use can be a dilemma. So, I recommend read your instructions and read the yarn labels. There's a whole host of info on those yarn labels. When knitting baby items, use soft sport yarn or fine or fingering yarn. For sweaters use worsted yarn. For afghans, worsted, wool, DK or Aran yarn works best. For rugs or sturdy jackets, use bulky or chunky yarns. Be sure to find out how much yarn comes with each skein, as each project calls for a specific amount of yarn, and each skein/ball of yarn is different. Always buy enough yarn in the same dye lots, even if you have to buy one extra, just to be sure. In time, you'll have quite a stash of extra yarn and that's when you can use your best knitting creativity to use those all up!

Gauge basics. I see the word "gauge" in every pattern I find. Is it that important? It depends. If you are knitting a scarf or place-mats or other specialty items, then gauge is not that important. But, for items to wear or even afghans, it is very important to know how many stitches per inch and per row, you are knitting with. The required gauge is always specified in every pattern, and before you begin that project, make a gauge swatch to measure correctness. If your gauge numbers are too small, try using larger needles and vice versa. Some knitters knit more tightly than others, so never go by what someone else's knitting produces.

It is mastering the basics, whether they be for knitting, cooking, painting, mothering, or brain surgery, that will make all the rest easy to do!

Remember, when you get to know the basics, you can create a world of knitting magic for yourself, that you will find, is just what you have been looking for! Knitting........enjoy!

Want to use this article for your blog or website? You can, you know, as long as you include this disclaimer in your article: Keep YOUR knitting on the "Cutting Edge" with FREE patterns. The place where smart knitters gather resources and share stories. FR.EE Details ==>http://www.theknitstitch.com

Article Source: http://EzineArticles.com/?expert=Alice_Seidel

©Craft Resources

Tuesday, February 26, 2008

Creating Embroidery Patterns By Freehand

Creating Embroidery Patterns By Freehand#

Have you thought about all the new designs that are on the shelves and just who is the one that puts them there? Most human beings are curious about these things because of human nature. People have the frame of mind for searching endlessly which is very tiring when it used for styles of a contemporary fashion. Thinking back to the past, you will note that a free hand design in embroidery was a large form of expression. This free hand form goes back to the time of 3000 BC.

There are several ways that are used for creating free hand patterns for embroidery like the use of three dimensional threads. By using this thread, there was more character that was given to home furnishings like linen, blankets, drapes, curtains, and others. Today's Western culture boasts that needlework is done only by the women. The Victorian age of English ladies and their embroidery crafts were all the proof that was needed to support this theory.

In the middle of the nineteenth century, the sewing machine was given to the world. The sewing machine went against the hand sewn designs since this was a much faster way to create the items. This equipment was not much better than free handed designs in embroidery. The sewing machine had a great impact on the ones that were operating them but, it also impacted that century’s economy.

Because of the problems with the sewing machine, a new surge of patterns for embroidery came out in full force. Some separate countries came up with their own types of designs like Danes, Hard ranger, and Hededo. Italy was not far behind when they created their own type called Reticella that was shown in all the soft details of the cutting. Some other countries in the Slavic Regions created clothing for the large parties that were adorned with the greatest items.

In Europe in the Western part, embroidery patterns

that were done by free hand were commonly shown to have wool in them. Crewel is one of the types that uses had two layers of the wool. This type of craft was already coming up to hundreds of years old. This type of embroidery was used for bed coverings and also chairs. It was also called Jacobean. This was a romantic form of the craft because each peace had a passion about it that was very obvious to the eye.

The Egyptians used shades of white in their crafting on a regular basis. Germany created Dresden that utilized lace that was sewn to a fabric that had minute outlines on it. Scotland also had a form of sewing that was called Ayrshire that was born in France. Anyone that was skilled in these would be unanimous in there decision that Ayrshire has to be the better of all the other forms.

You can also find more info on Embroidery Designs and Embroidery Digitizing. Allthingsembroidery.com is a comprehensive resource to know more aboutEmbroidery.

Article Source: http://EzineArticles.com/?expert=David_Faulkner


©Craft Resources

Free Pattern For Craft

Free Pattern For Craft#

Get your Free pattern at Freepattern.com

©Craft Resources

Inprogress

Inprogress#

Inprogress Customizing and Updating Blog.

Come Back Again Real Soon.

Regards,

Lyn.

©Craft Resources

Related Articles by Categories:


Widget by Hoctro
 
Copyright ©2008-2010 Craft Resources Blog